Installation
Requirements
Xcode 11+
iOS 12+
Minimum Supported Devices
iPhone 6 and 6plus
iPad mini 4
iPad Air 2
iPad Pro (1st generation)
iPad 5th generation
Add the XCFramework
The Selfie Capture SDK is distributed as an XCFramework with support for iOS and any iOS Simulator. While selfie capture is not supported on a Simulator, this allows you to run and test the rest of your application without the need for a physical device.
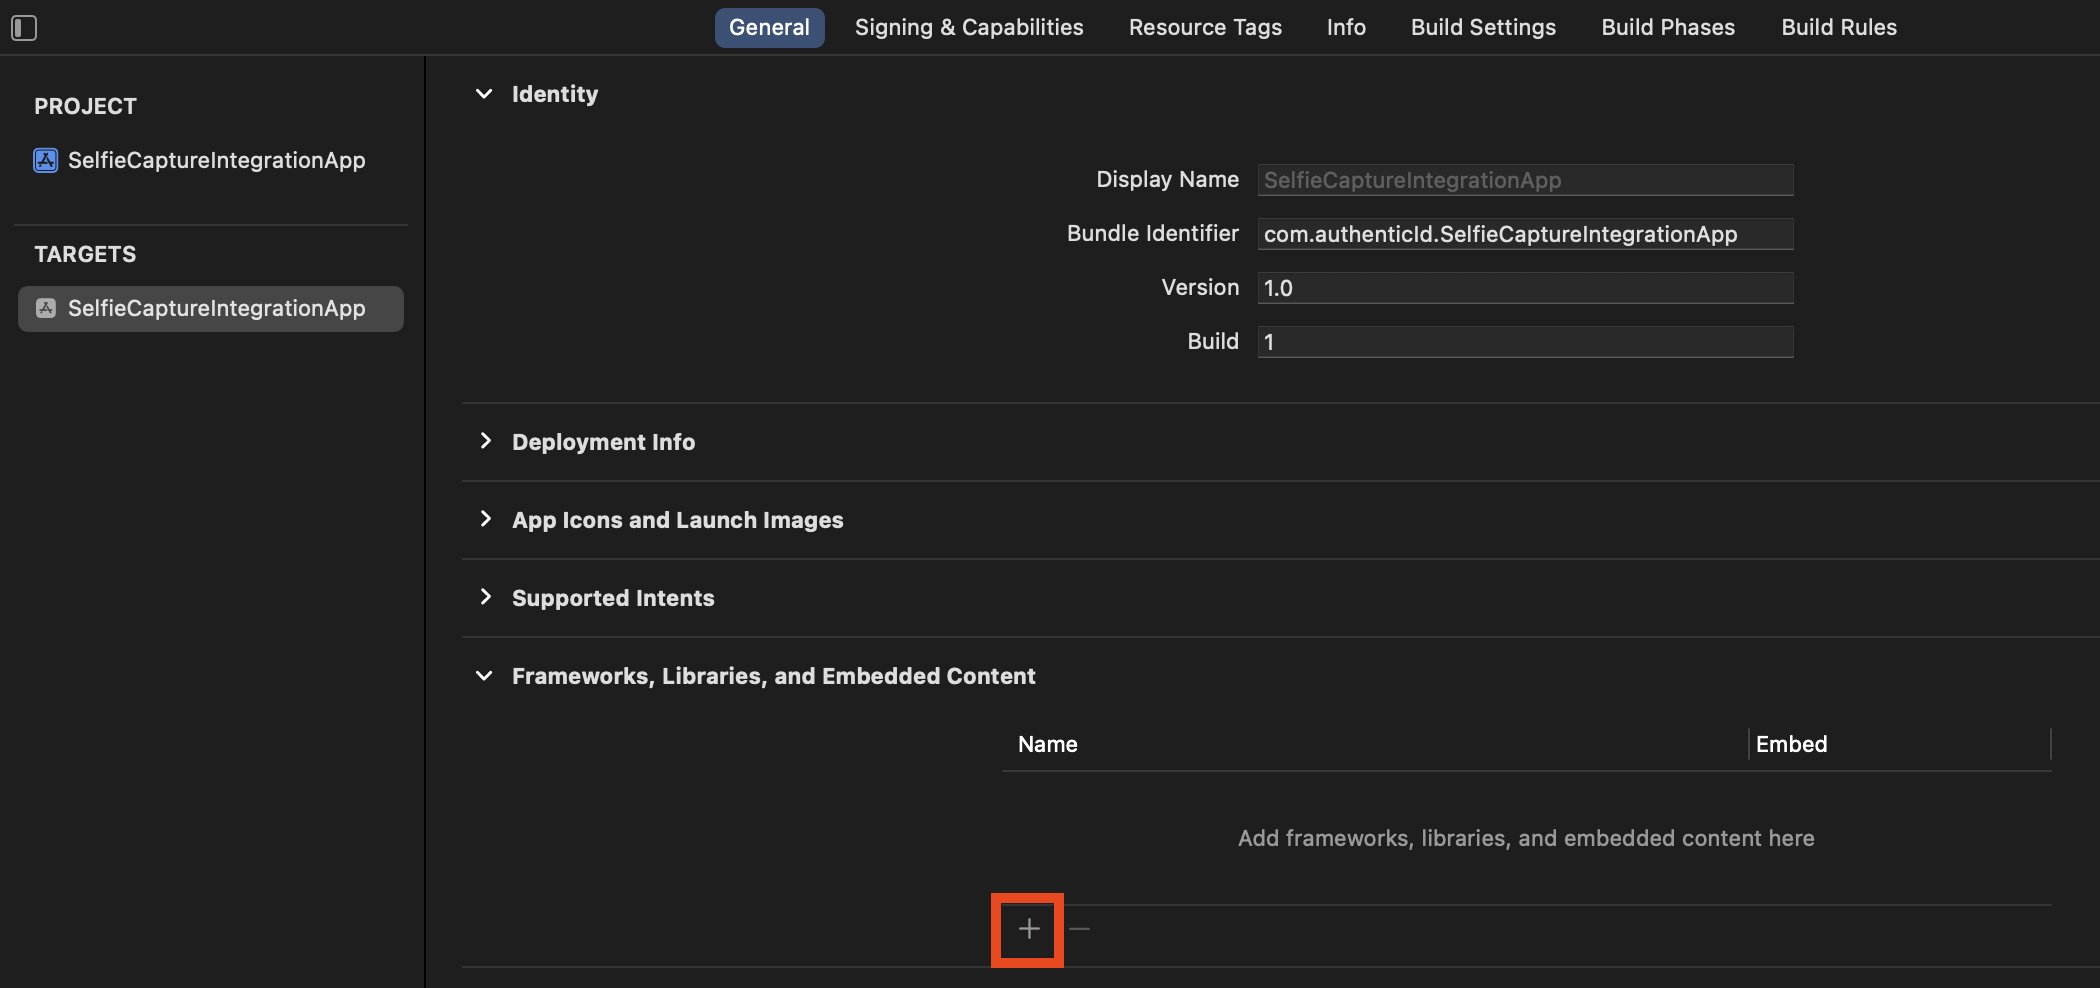
First, move the provided IDMetricsSelfieCapture.xcframework into your project directory or a subdirectory. From there, add it to your application target:

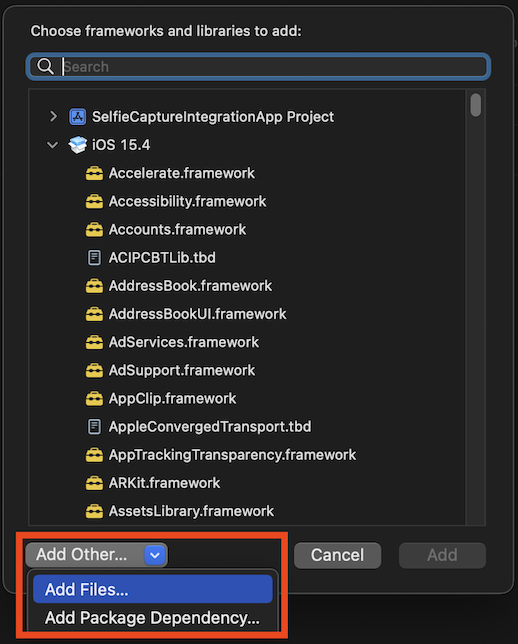
Select Other, then Add Files…:

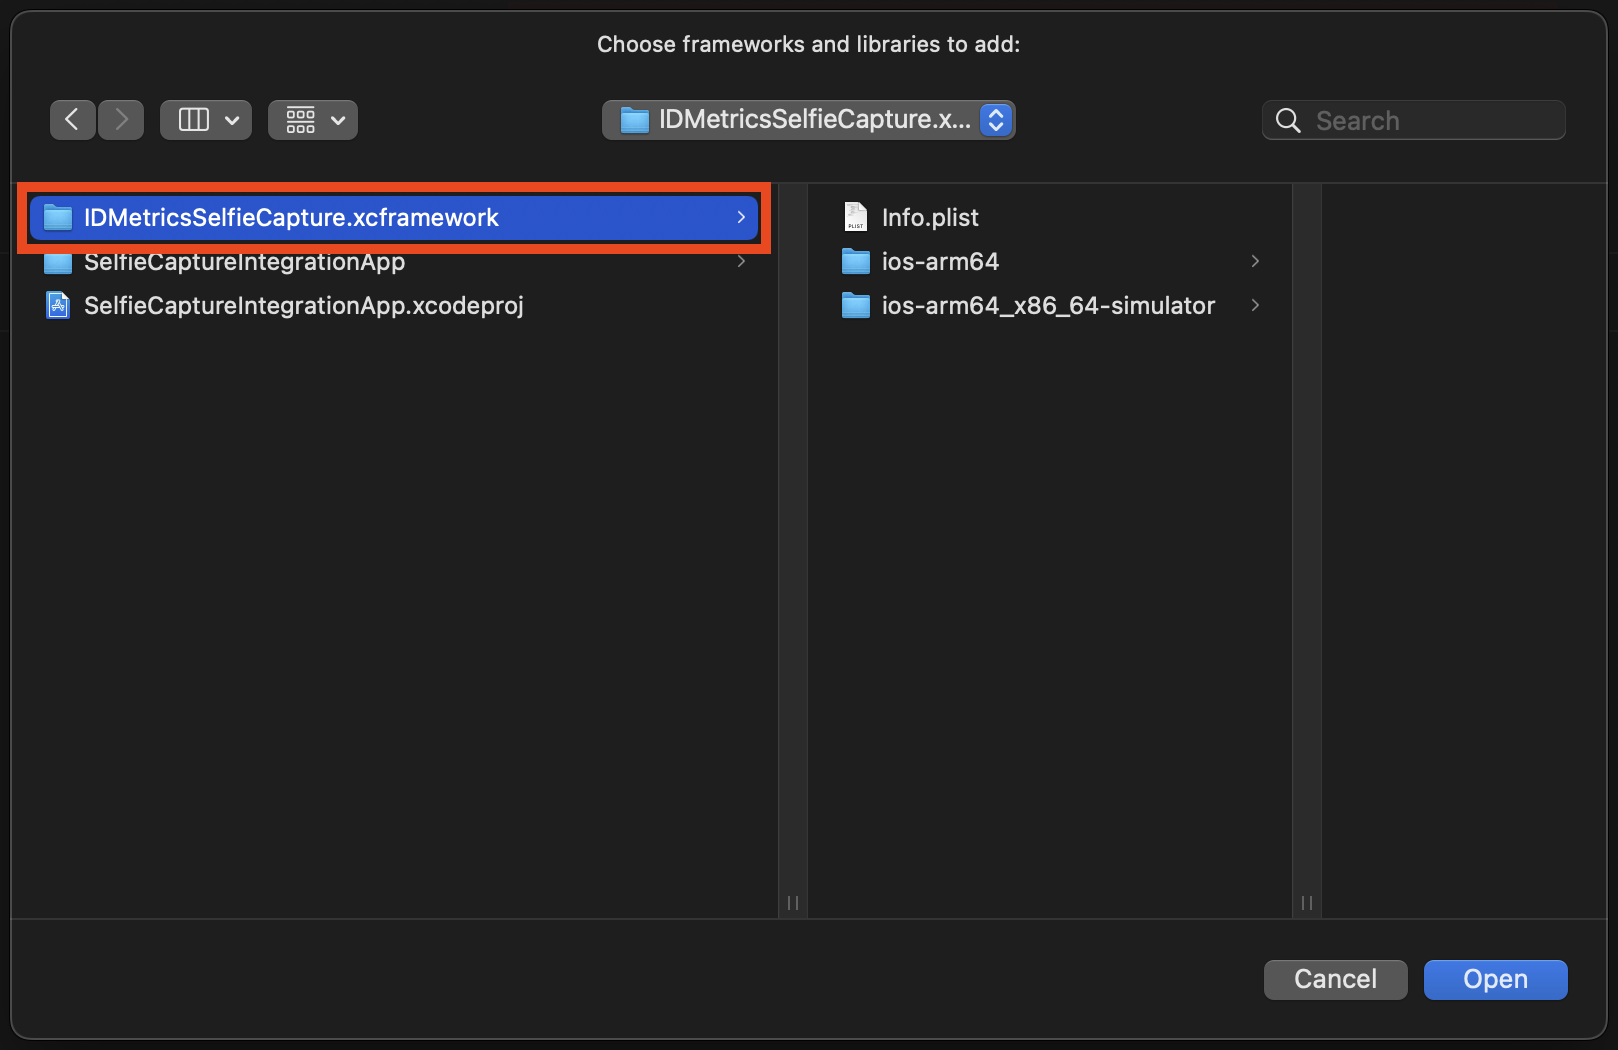
Navigate to where your IDMetricsSelfieCapture.xcframework is stored, select it (the .xcframework folder), and then click Open:

Make sure the framework is set to Embed & Sign:

Camera Permission
Requesting permission for use of the device camera requires that you set a usage description in the Info.plist:
<key>NSCameraUsageDescription</key>
<string>The camera is needed for selfie capture.</string>
The description will be displayed to the end-user when your application first asks for access to the camera. If you support multiple languages, this description can be localized; for more information, see Apple’s official documentation on Information Property Lists.
You can then request camera permissions from the end-user via AVFoundation:
if AVCaptureDevice.authorizationStatus(for: .video) == .authorized {
    // Already Authorized
}
else {
    AVCaptureDevice.requestAccess(for: .video) { granted in
        if granted == true {
            // User granted access. Let the app continue.
        }
        else {
            // User denied access. The SDK may not continue.
        }
    }
}
For more detailed documentation, refer to Requesting Authorization for Media Capture on iOS.
Location Permission (Optional)
Requesting access to the end-user’s geolocation requires you set one or two usage descriptions in your Info.plist, depending on which type of access is needed:
<key>NSLocationWhenInUseUsageDescription</key>
<string>Location data is used to increase selfie fidelity.</string>

<!--You must also add an NSLocationAlwaysAndWhenInUseUsageDescription if "always" permission is required-->
The description will be displayed to the user when your application first requests for each level of permissions. If you support multiple languages, this description can be localized; for more information, see Apple’s official documentation on Information Property Lists.
You can then request location permissions from the end-user via CoreLocation:
import UIKit
import CoreLocation

class ViewController: UIViewController, CLLocationManagerDelegate {

    let locationManager = CLLocationManager()

    override func viewDidLoad() {
        super.viewDidLoad()

        // Handle authorization changes
        locationManager.delegate = self

        // Get the current permission
        let status = locationManager.authorizationStatus

        handle(authorizationStatus: status)
    }

    private func handle(authorizationStatus: CLAuthorizationStatus) {
        switch authorizationStatus {
        case .notDetermined:
            // We have not yet requested permission
            locationManager.requestWhenInUseAuthorization()
            return
        case .authorizedAlways, .authorizedWhenInUse:
            // We already have permission and can proceed
            break
        default:
            // User has denied permission, or parental / MDM settings
            // disallow it. The SDK will still function.
        }
    }

    // MARK: - CLLocationManagerDelegate

    func locationManagerDidChangeAuthorization(
        _ manager: CLLocationManager)
    {
        let status = CLLocationManager.authorizationStatus()
        handle(authorizationStatus: status)
    }
}
For more detailed documentation, refer to Requesting Authorization for Location Services.