Understanding the ePassport Integrated Circuit
The specification on ePassports is very long and very technical—11 parts, to be exact! But don’t worry; you don’t need to read any of it in order to understand and use the NFC Reader SDK.
Near-field Communication
The first concept to understand is Near-field Communication, or NFC. Without getting into the weeds, NFC is a set of protocols that define how two capable hardware devices can communicate with each other over a short distance. If you’re familiar with RFID, then NFC is similar to that, except communication is done over much shorter distances & communication can go in both directions.
In most NFC sessions, there exists an NFC reader and an NFC tag. The NFC reader typically provides power to the NFC tag. The tag itself consists of a few different components in order to make this possible, but the most important component is the core of an NFC tag: the NFC chip, also known as the integrated circuit or IC. The IC ultimately stores and exchanges whatever data it was programmed to do so.
Without the need for its own power supply, an NFC tag can be embedded in standard objects with a low profile—for example, a passport.
ePassports
The terms “ePassport”, “biometric passport”, and “digital passport” are all interchangeable and mean the same thing: a passport that contains an NFC tag. More officially, these types of passports are actually one of a few classifications of electronic machine-readable travel documents, or eMRTDs. However, since passports are the most common & provide the most necessary information for identity proofing, you probably don’t need to worry about the other classifications.
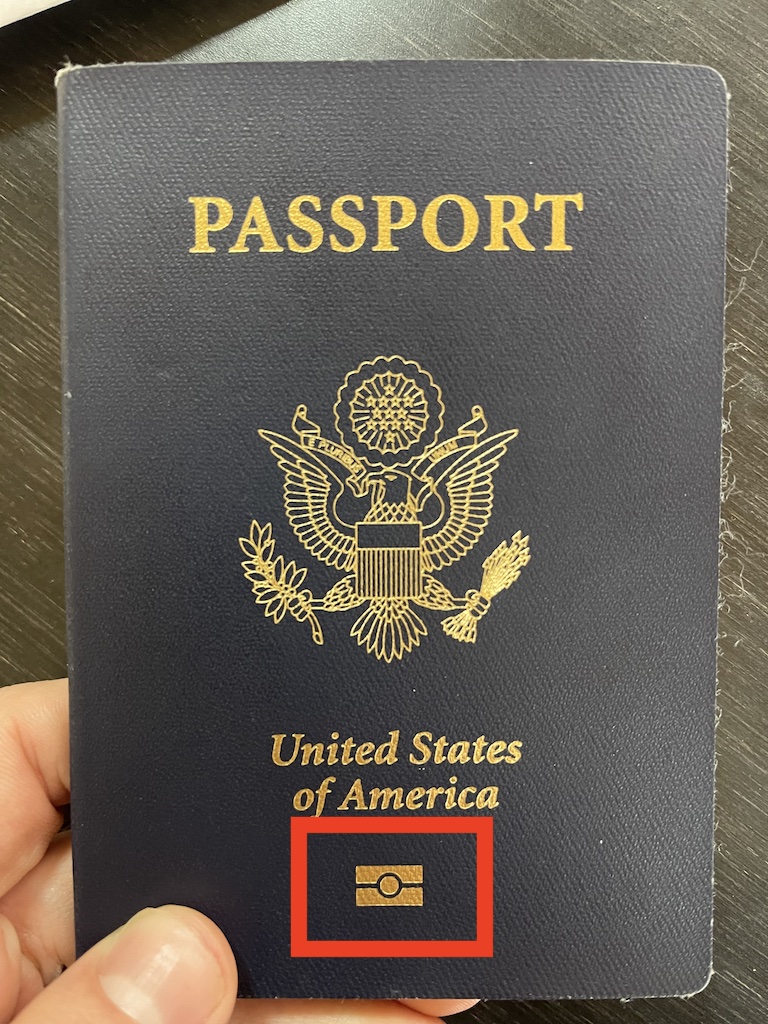
Today, over 150 countries issue ePassports. You can identify this capability by looking for the biometric symbol, which exists on all forms of eMRTDs:

Tag Location
Unfortunately, the requirements on the physical location of the ePassport tag are very open-ended. Some passports may hide the chip in the front cover, some in the back cover. Others place the chip on pages separate from the biopage. To top it off, the chip can be in many different orientations. It can be pretty much anywhere in the booklet!
To work around this, we suggest guiding the user to first place their device on inside of the booklet, perpendicular, so that the bottom of the device is somewhere on the biopage. From there, slowly drag the device down toward the biopage until a connection is established. This spans most of the potential chip locations, especially common locations in the US and Canada. If that fails, then the same process can be repeated against the back cover, and then against the front cover. A visual guide for this exists in the TutorialNFCViewController, which is used in Tutorial Screens.
The ePassport Integrated Circuit
At a high level, there are 3 phases covered while communicating with the IC:
Authenticate
Read elementary files
Verify the data
Authentication
You won’t be able to access ePassport data unless you can prove that you are in possession of it. Similarly, if we detect a spoof or clone, we may cut ties with the connection ourselves. There are a number of authentication protocols that allow for these mechanisms, but they all start with the same need: the MRZ_information. To understand the MRZ_information, you first must understand the Visual Inspection Zone and the Machine-Readable Zone.
Visual Inspection Zone
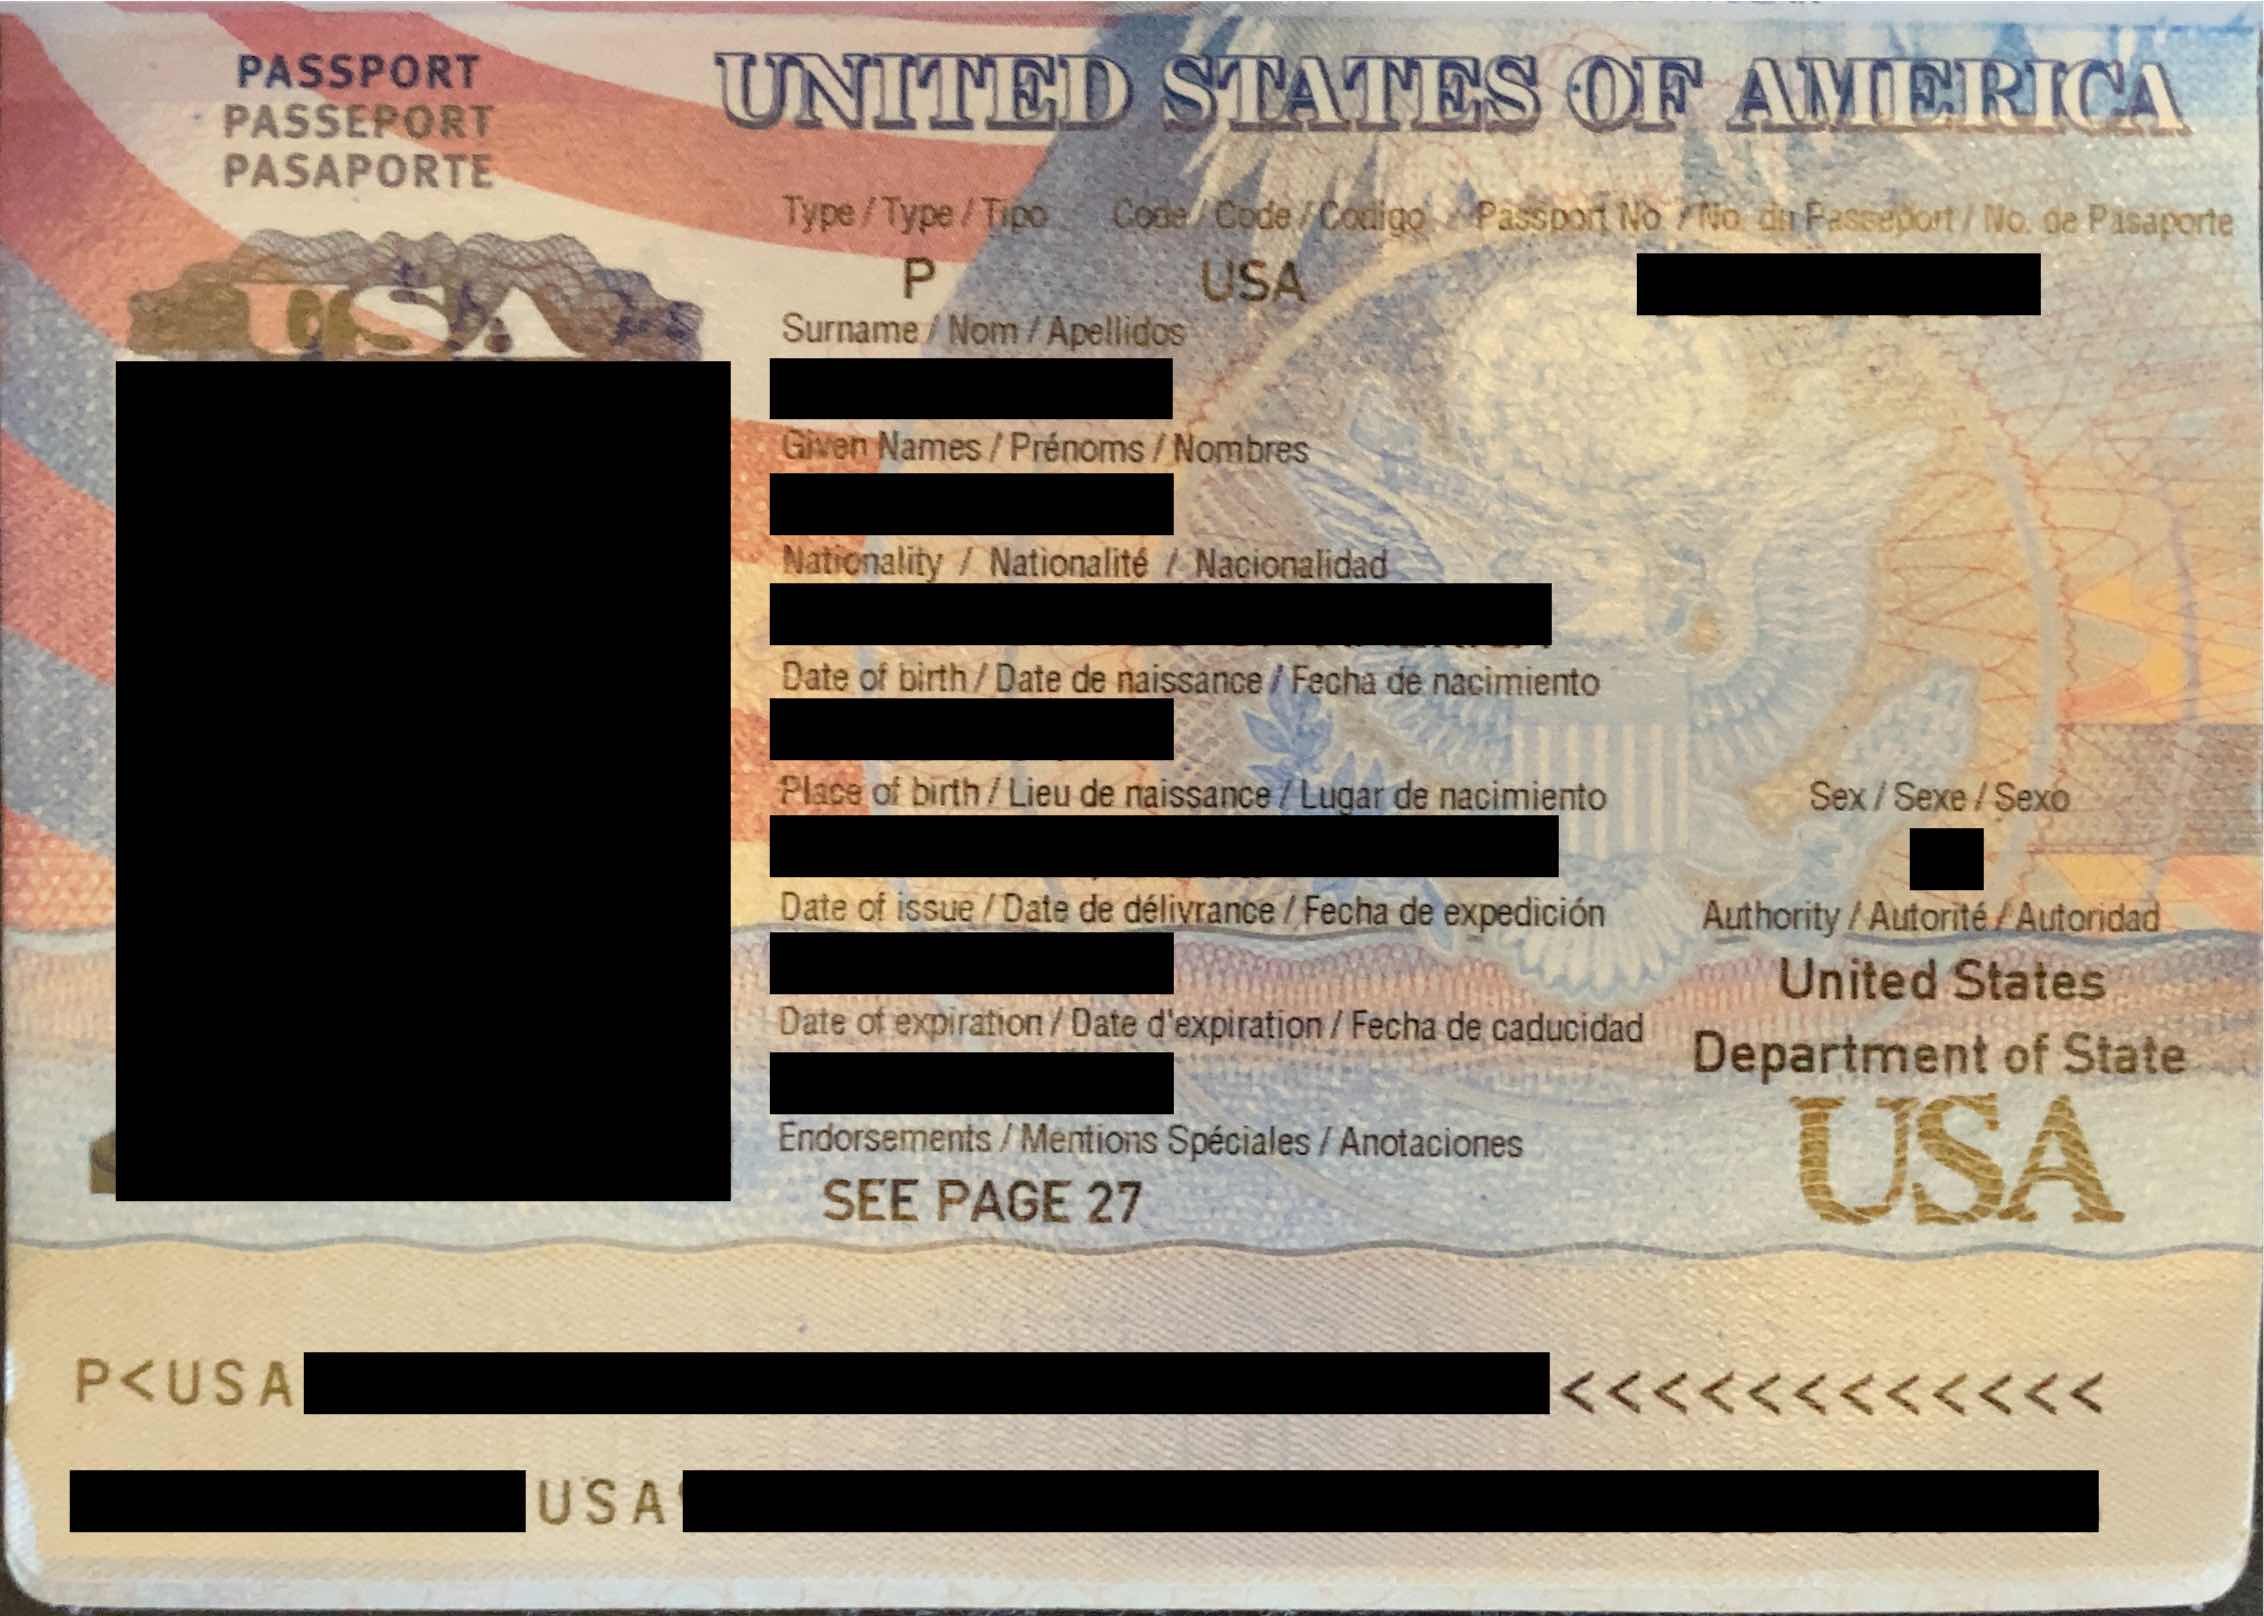
The Visual Inspection Zone, or the VIZ, is the technical term for the passport biopage and signature page. The VIZ contains biographical information about the holder, information about the issuing authority, information about the passport, and biometric data (photo + signature).

The biopage, which is part of the VIZ (Visual Inspection Zone)
Machine-Readable Zone
The Machine-Readable Zone, or the MRZ, is the text at the very bottom of the VIZ, easily denoted by the < padding characters. On a passport, the MRZ is 2 lines long, each 44 characters in length.
The MRZ is mostly composed of elements contained within the VIZ. Diacritics are omitted, and some segments are truncated due to space limitations. The top line contains:
The type of travel document (
P== Passport)The issuing authority (ex.
USA)The full name of the holder
The bottom line contains:
The document number, plus a check digit (a form of checksum)
The holder’s nationality
The holder’s date of birth, plus a check digit (
YYMMDDC)The date the passport was issued, plus a check digit (
YYMMDDC)
MRZ_information
The MRZ_information is a key derived from the MRZ. It is simply a concatenation of 3 elements from the bottom line:
The document number, plus its check digit
The holder’s date of birth, plus its check digit
The date the passport was issued, plus its check digit
Note
Extraction of the MRZ_information is done automatically by the Document Scan SDK, starting in version 5.7.0. You must update your DSPassportOptions.mrzCaptureMethod to .recognize in order for the DSPassportResult.mrz field to be populated.
Elementary Files
Once authenticated, we can begin reading all of the Elementary Files, or EF for short. You can think of EF’s like a file stored on your computer; they’re just chunks of data. The files we’re specifically after are called Data Groups. There are up to 16 Data Groups available on a passport, each with a very specific purpose. Many of the Data Groups defined are optional, and most passports will only contain a couple of them. For more information on the groups available in the SDK, you can check out PassportChipData in the code reference. For more verbose documentation on every data group, see ICAO Doc 9303 Part 10.
We’re also after an Elementary File called the Document Security Object, or the SOD. The SOD is a CMS structure, containing hashes and certificate data, which we will briefly cover in the next section.
Verification
With security data from the SOD, we can verify the integrity of the passport, meaning that we can prove that it hasn’t been tampered with. This is done by computing hashes of each of the Data Groups ourselves, comparing against the SOD, and verifying the signature of the SOD using the embedded certificate (AKA CMS verification).
The embedded certificate is called a Document Signer Certificate (DSC). This is issued using a root authority certificate, called a Country Signing Certification Authority (CSCA) Certificate. By validating the DSC against a trusted CSCA certificate or certificate list, we can verify the authenticity of the passport, meaning that we can prove that it was issued by a source we trust.
Warning
CSCA verification within the SDK requires you to provide a certificate list yourself. In many cases, these lists are not allowed to be distributed for commercial use & are only available for personal use.